
LIFESTYLE
How to Make a Saddle: A Step-by-Step Guide for Horse Owners
How to make a saddle starts with a tree matched to your horse’s shoulder and back, then leather, a level seat, and nine fit checks before you ever ride.

You want to know how to make a saddle, and the bench in front of you is covered with leather. The hide is the part people photograph, and the part your horse wears is the tree under it.
A saddle the horse can work in starts as a tree matched to that back, whether the tree carries western bars and a horn or English points and flocked panels. Both have to clear the spine and let the shoulder move.
The work below follows that order: what to measure, how the build goes, the nine fit points to use while the saddle is still open, the marks a wrong tree leaves, and the moment to hand the job to a saddler or a fitter.
What a Saddle Tree Has to Match
The tree is the rigid frame. On a western saddle it is two bars joined by a fork in front and a cantle behind, with a gullet tunnel over the withers. On an English saddle the front ends in points, and the weight sits on stuffed panels instead of wide skirts. Conchos and tooling do not change that frame.
Stand the horse square on level ground with no pad under the tree. Feel the rear edge of the shoulder blade, then the last rib, and follow that rib up as far as the back muscles allow. The bearing surface belongs between those two marks. Behind the last rib is the loin, and the loin cannot carry a rider.
Wither shape, back length, shoulder slope, and the spring of the rib all change the tree you need, and a pony is not a small horse. Most fit trouble shows up at the withers. With you mounted and the girth tight, a stock saddle wants about 2 inches of wither clearance. Fork width and the named gullet sizes are a different measurement, so they live in the table.
| What you measure | The figure | Where it applies |
|---|---|---|
| Mounted gullet clearance | About 2 inches | Stock saddle, rider up, girth tight |
| Fork width | 5.5 inches to 7 inches | Stock saddles; average saddles fall between 6 and 6.75 inches |
| Wither width to compare with the fork | Taken about 2 inches below the top of the withers | Pads can forgive a small miss, so an exact match is not the whole job |
| Regular quarter horse bars | 5 3/4 inches | Raw tree |
| Semi-quarter horse bars | 6 inches | Raw tree |
| Full quarter horse bars | 6 1/4 inches to 6 1/2 inches | Raw tree |
| Extra-wide quarter horse bars | 6 3/4 inches to 7 inches | Raw tree |
| Arabian bars | 6 1/4 inches to 6 3/4 inches | Raw tree, with a flatter pitch than quarter horse bars |
Those bar names are gullet widths taken on the raw tree, and the saddle industry has no single standard for them. Once the leather is on, that raw width is no longer something you can read from the outside. A wider gullet plate screwed to the same bars leaves the bar angle alone, and the plate still has to lock.
Too little clearance, even under a thick blanket, means the fork is too wide, the withers are high and narrow, or both. A tree that is too narrow on flat withers sits high in front. Extra blankets do not correct that, and you should not rope from a saddle that narrow.
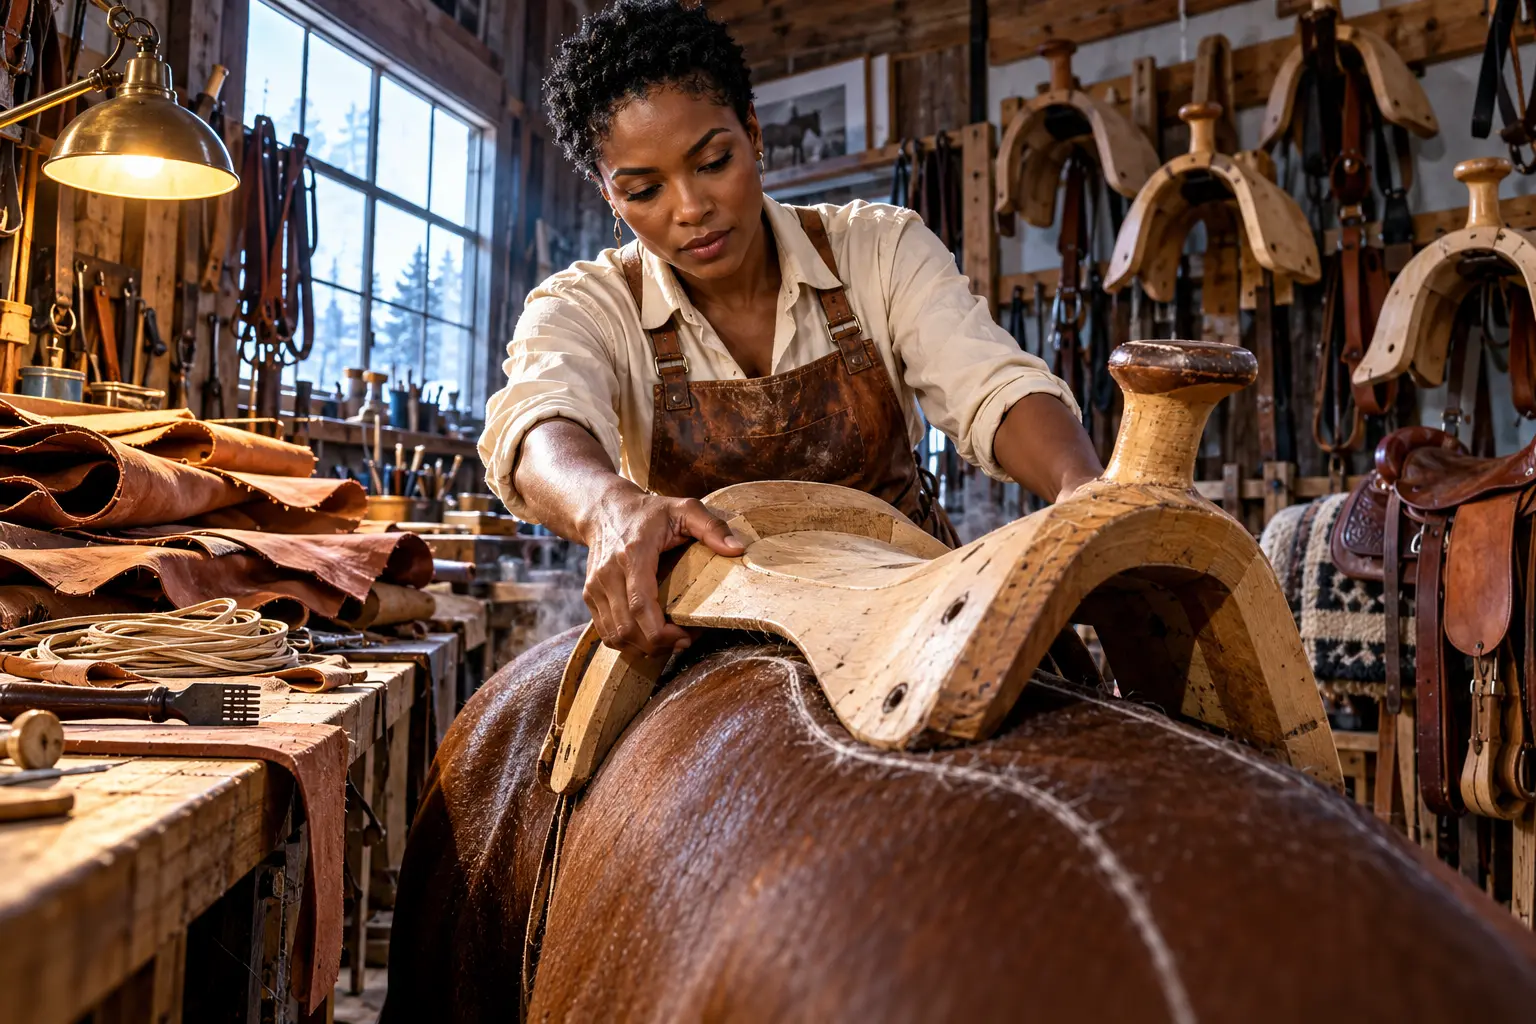
How to Make a Saddle From the Horse Outward
Leather comes after the tree has already passed on that horse. Makers who start by cutting a hide are building a cover for a shape they have not proved.
- Choose the job before the hide. Stock, rope, hunt-jump, and dressage put your weight in different places. At the walk, balance sits just behind the withers; speed shifts it forward, and a collected horse shifts it back. A roping rig and a gaited show saddle are not interchangeable seats.
- Mark the horse while it stands square. Find the rear edge of the shoulder blade and the last rib. Keep the bearing surface between those marks, and keep it off the loin.
- Order or build the tree from those marks. Many western shops buy the tree rather than carve it at the leather bench. Set it on the back with no pad. If it bridges in the middle, pinches, or rocks, stop. Stitching will not repair the angle.
- Wet the leather so it will mold, then let it set before you commit the shape. On a western saddle the cover usually starts at the gullet and moves over the bars, the fork, the skirts, and the seat. The ground seat is built up in layers and shaped to you. English work skips the horn and builds webbing, a seat, and panels you will stuff.
- Stitch the seams that carry a rider by hand, and line up any tooling before the leather is fixed. A heavy coat of neatsfoot oil is a common western finish because it darkens the leather and slows water damage. Leave the horn cover until the fork under it is finished, then add fenders, stirrup leathers, billets, and the cinch for the job you actually ride.
- Springfield Leather filmed saddler Denny Lowe covering a western tree from the gullet through the last lacing. That shop put the build at 150 to 200 hours. The film is a clear look at the order. One maker’s horn cap or cantle height is not a rule for your horse.
The sequence in that shop film runs from the gullet cover to skirts, rigging, and the last lacing, which is the part written steps cannot show you.
Girth the finished saddle, get on, and confirm the mounted clearance in the table. Ride long enough for the back to sweat under the pad, pull the saddle, and look for an even sweat pattern. Then run the nine points below before you call the saddle done.
Nine Points of Saddle Fit Before You Close the Leather
Gene Freeze, founder of the Master Saddlers Association and a County Saddlery saddler in Woodbine, Maryland, taught these nine points as the checks any rider can see. They were built for English saddles in a fitting course, and the same questions of place, angle, channel, and length decide a western tree. Run them on the bare tree, and run them again after the leather and the flocking are on.
Where the Saddle Should Lock
Place comes before flocking. A saddle that looks fine at the halt can still meet the shoulder blade once the horse moves, because that blade swings back under the front of the tree.
- Stand the horse square on level ground and put the saddle on with no pad, slightly forward on the withers.
- Set one hand on the neck in front of the withers, take the pommel, and tug back and down until the saddle stops in the same place each time.
- On an English tree, the points should sit behind the rear edge of the shoulder blade. The blade moves back by as much as three inches in motion, so a saddle parked on the blade blocks the shoulder.
- Keep the bearing surface between the withers and the spot where the last rib meets the spine, the place fitters call T18. Past that spot the saddle sits on the loin.
Western fit guidance puts the bars just behind the shoulder blade, centered from left to right, with even contact and no big rock at the back. A stock saddle that needs to sit over the top of the blades is a different case: a straight shoulder can let the bars slide back and dig the rear edge of the blade. A breast collar belongs in that case. It does not belong as a strap that pins the saddle forward of the place it keeps finding on its own.
Tree Angle, Channel, and Wither Clearance
Tree width is the check that decides whether the saddle fits at all. Flocking and a thicker pad can change height a little. They do not change the angle of the wood or the synthetic under the leather.
WHAT THE ANGLE IS TELLING YOU
- Unridden English: Two and one half to three fingers should fit between pommel and withers without feeling cramped.
- Point angle: The points should lie parallel to the horse or within 10 degrees of parallel. Steeper than the horse means the tree is too narrow. Flatter means it is too wide.
- Too narrow: The points dig in at the bottom, and on flat withers the front of the saddle sits high.
- Too wide: The tree sits down on the withers, and once you mount it can roll forward onto the panels.
- The channel: From behind the horse, the gullet clears the spine and the tissue beside it, including when you push down on the cantle.
- Forced tree: Prying an ill-fitting tree can break the points, shear rivets, or disturb the webbing under the seat, and it can void the warranty.
A factory-authorized maker should do any change to the tree. If the horse is uneven from side to side, weight can shift the saddle onto the spine even when the empty channel looked clear, and a balance strap, an extra billet, is one way fitters keep it from sliding. Look down the channel again after you are mounted, not only on the rack.
Panel Contact and the Horse’s Answer
With the tree in the right place, the seat’s deepest point should sit in the center, level between pommel and cantle. A dressage cantle is higher than the pommel by design, because the rider sits for long stretches. If the saddle is only a little low behind and the tree is not too narrow, flocking in the back of the panel can lift the cantle.
A deepest point that sits too far back dumps you toward the cantle, loads the back panels, and invites the horse to hollow. In the sitting trot you then tip forward onto your crotch to keep from being left behind. A deepest point too far forward slides you onto the pommel, and the usual answer is to brace the leg, which dulls the aids.
- Press the saddle as if a rider were sitting, and run a hand under the points from top to bottom, then along the panel from front to back.
- Feel both sides. Most horses are not built the same on the left and the right.
- A gap in the middle is bridging. A saddle that seesaws when you press pommel and cantle in turn is rocking, from uneven flocking, a wrong tree, or a panel shape that does not match the back.
Free movement is the last test, the one veterinarian Joyce Harman sums up as “the horse never lies.” A horse that travels without hesitation is giving you a pass. Fidgeting when the saddle comes out, or crabbing, collapsing, or hollowing when the girth comes up, is a fail even if every finger check looked tidy in the aisle.
What Does a Wrong Tree Do to the Back?
An even sweat pattern is only useful if you know which mark means pressure. After the ride, look and then feel. Soreness in the loin often leaves nothing you can see.
MARKS THAT MEAN PRESSURE
- Dry patches: Missing sweat on each side of the withers means the skin was compressed, and it shows up more on young horses with immature backs.
- Raised skin: A dry spot that stands up can become a saddle sore or grow back as white hair if you keep riding.
- The loin: Pain here often has no visible mark, and it commonly comes from bridging, straight bar tips, or skirts that interfere.
- Skirts and hips: A long square skirt on a short back can rub the hips, and straight bars can sore a horse with big shoulders at the front edge of the skirt.
- The channel: A gullet with no room lets the vertebrae grind the pad and opens pressure sores along the spine.
Some horses stay quiet about a saddle that sits too far forward, and others stop bending or start to fight. Wither injury also shows up as bucking, head slinging, or a horse that hates being saddled. Those habits are a reason to refit before the next ride, and a sore, swollen back is a reason to call a veterinarian rather than add another blanket.
Pads, Flocking, and a Back That Changes
A pad protects the back and the saddle, takes some shock, and helps the saddle meet a back that is not perfectly flat. It is not a new tree. More thickness under a saddle that already sits on the withers can make the pressure worse.
Wool felt and woven wool wick sweat and take a set on one horse with one saddle, which is why a saddle maker writing for Cooperative Extension prefers them to foam and gel. Some gel pads trap heat and bunch the pressure instead of spreading it, which matters once the work runs past an easy hour. Most western horses do fine with five-eighths of an inch to 1 inch of total pad. Rope horses and jumpers may need more shock absorption than that.
“Put the flocking in there as light and fluffy as possible,” says saddler David Young, who taught the wool work beside Freeze’s checklist. “Don’t let it ball up.” Extra wool can level a saddle whose tree already fits, fill a bridge, or ease a pressure point. It cannot make a narrow tree wide. Check both panels, because a shim under one side is sometimes what keeps an uneven horse from shoving the saddle onto the spine.
The back under a finished saddle is not a fixed shape. The saddle that fits in winter can sit differently after the horse spends summer on grass. Young horses often carry fat beside the withers that fades with age, and the vertebrae can drop into what fitters call a wither pocket. Run the nine points again when the horse’s condition changes, not only on the day you finish the stitching.
Who Should Build the Saddle and Who Should Fit It?
Making and fitting are separate skills. A saddler makes tack and a fitter fits it, which is how the Society of Master Saddlers divides the work. The Society’s fitting qualification arrived in 1995, long after the craft of making saddles, bridles, and harness was already examined. A weekend with a hide does not stand in for either ticket.
- The fitting path: The Society’s route to a registered qualified saddle fitter takes at least two years, with a flocking qualification before the final assessment.
- The master title: Master goes to a qualified saddler or fitter with more than seven years of experience whose work stays at an outstanding level.
- Your tree: Leave changes to the tree with the maker who can stand behind the warranty.
An extension guide dated July 31, 2019 framed the money question as more than $2,000 for a custom saddle against a $1,000 factory saddle, and the useful answer was not automatic. A careful custom build should fit horse and rider better, use heavier materials, and last longer because the parts are cut and shaped by hand. A mediocre custom build can lose to a well-made factory saddle. Spend the extra money for a proved fit, not for tooling alone.
If you are building your first saddle, a course with a working saddler is the honest start. Use the nine points to see what that course is aiming at, and have a qualified fitter look at the horse in the finished saddle before you take it out for real work.
Frequently Asked Questions
Can You Measure Gullet Width on a Finished Saddle?
Once the leather is on, the raw gullet width is no longer a number you can recover from the outside. On a stock saddle, measure between the bars where the saddle strings pass through the skirts. If there are no front strings, measure about 1 inch above the lower edge of the bars, directly under the horn. Used trees spread, so measure a secondhand saddle instead of trusting the size marked on it.
Which Rigging Position Fits a Pleasure Saddle?
Full rigging sits under the horn and lines the horn, cinch, and rigging up over the withers, which is what a rope needs. Center-fire sits halfway from the horn to the top of the cantle. A pleasure rider who does not rope is usually best served by seven-eighths rigging, the spot most shops can supply. On a hunt saddle, the billet you choose can move where the saddle sits by as much as 3 to 4 inches, so the rigging is part of the fit.
Can a Custom Saddle Move to a Second Horse?
A saddle made for one unusual back is a poor bet on the next horse. The back you built for will change as that horse ages, and most saddles outlast the horse, so you can be left with a tree that fits a shape you no longer ride. Build for the horse in the barn now, and expect a new back to need its own check rather than a hand-me-down tree.
When Should You Add a Breast Collar?
Add one when the girth slopes backward toward the rigging, or when a straight shoulder lets the bars slip back and dig the rear of the shoulder blade. Cinching harder instead only loads the withers and can gall a fat horse. Do not use a breast collar to pin the saddle forward of the spot where it wants to stop, because that forward spot is a common way to block the shoulder.
After a season at grass, the two marks you can still find with your fingers are the rear edge of the shoulder blade and the last rib. If the bearing surface has crept past either one, the leather is not the thing that changed.
Disclaimer: This is an educational guide to how a saddle is built and checked, and it is informational only. It is not a saddle-fitting assessment, veterinary advice, or a substitute for a qualified saddler or saddle fitter looking at your horse. Have a qualified fitter check any saddle before you ride in it, and call a veterinarian if the back is sore, swollen, or the horse will not move freely. Clearances, bar sizes, and fitting rules here reflect the sources reviewed and can differ by saddle type and by later changes in the horse.

A CubeSat Will Age Whisky That Never Comes Home

A Charity Quote Cost Shia LaBeouf the FKA twigs NDA

Looker Turned a Model’s Body Into Ad Inventory

Infinity Ward Bets a Paid DMZ Will Stick This Time

Disney Sidesteps a Kimmel Renewal as Failla Cites Losses

Southwest Preboarding: Who Qualifies and What to Do

False AI Intel Nearly Put US Crews on a Chinese Ship

How Often Do You Have to Change a Monkey’s Diaper?

Tim Cook’s $4.6 Trillion Apple Still Runs on One Phone

Dunes Air Sues Nora Fatehi Over Its Luxury Jet
-
 TRAVEL3 years ago
Southwest Preboarding: Who Qualifies and What to Do
-
 NEWS2 months ago
False AI Intel Nearly Put US Crews on a Chinese Ship
-
 LIFESTYLE3 years ago
How Often Do You Have to Change a Monkey’s Diaper?
-
 BUSINESS2 months ago
Tim Cook’s $4.6 Trillion Apple Still Runs on One Phone
-
 ENTERTAINMENT2 months ago
Dunes Air Sues Nora Fatehi Over Its Luxury Jet
-
 LIFESTYLE3 years ago
How Long Does It Take for Armpit Hair to Grow?
-

 NEWS2 months ago
OpenAI Posts a Navier-Stokes Proof Clay Has Not Touched
-
 SPORTS3 years ago
Is Marching Band a Sport?